Octal Clock - Clock Faces in-depth
As promised in Part 2, here's is a more in-depth discussion of how the digital and analog clock faces were created for our Octal Clock app.
If this is your first encounter with the Octal Clock, you can start at Part 1 for the full series.
Download
You'll probably want the source code, if you don't already have it. Visit the GitHub repository and clone the repository.
This post uses the step2 branch:
git clone https://github.com/killermonk/octal_clock_app.git
git checkout step2
Digital Clock Face
First, terminology: "Pixel" below means one of the LED segments on a normal digital clock, not a pixel on your screen. Moving on.
I built the digital clock face first thinking that it would be the more simple of the two. In the end, it ended up taking twice the amount of code and thrice the amount of time. Most of the code is pretty straight forward, but there were two challenges:
- Shaping and aligning the pixels properly
- Figuring out which pixels to turn on for which number
Building a Pixel
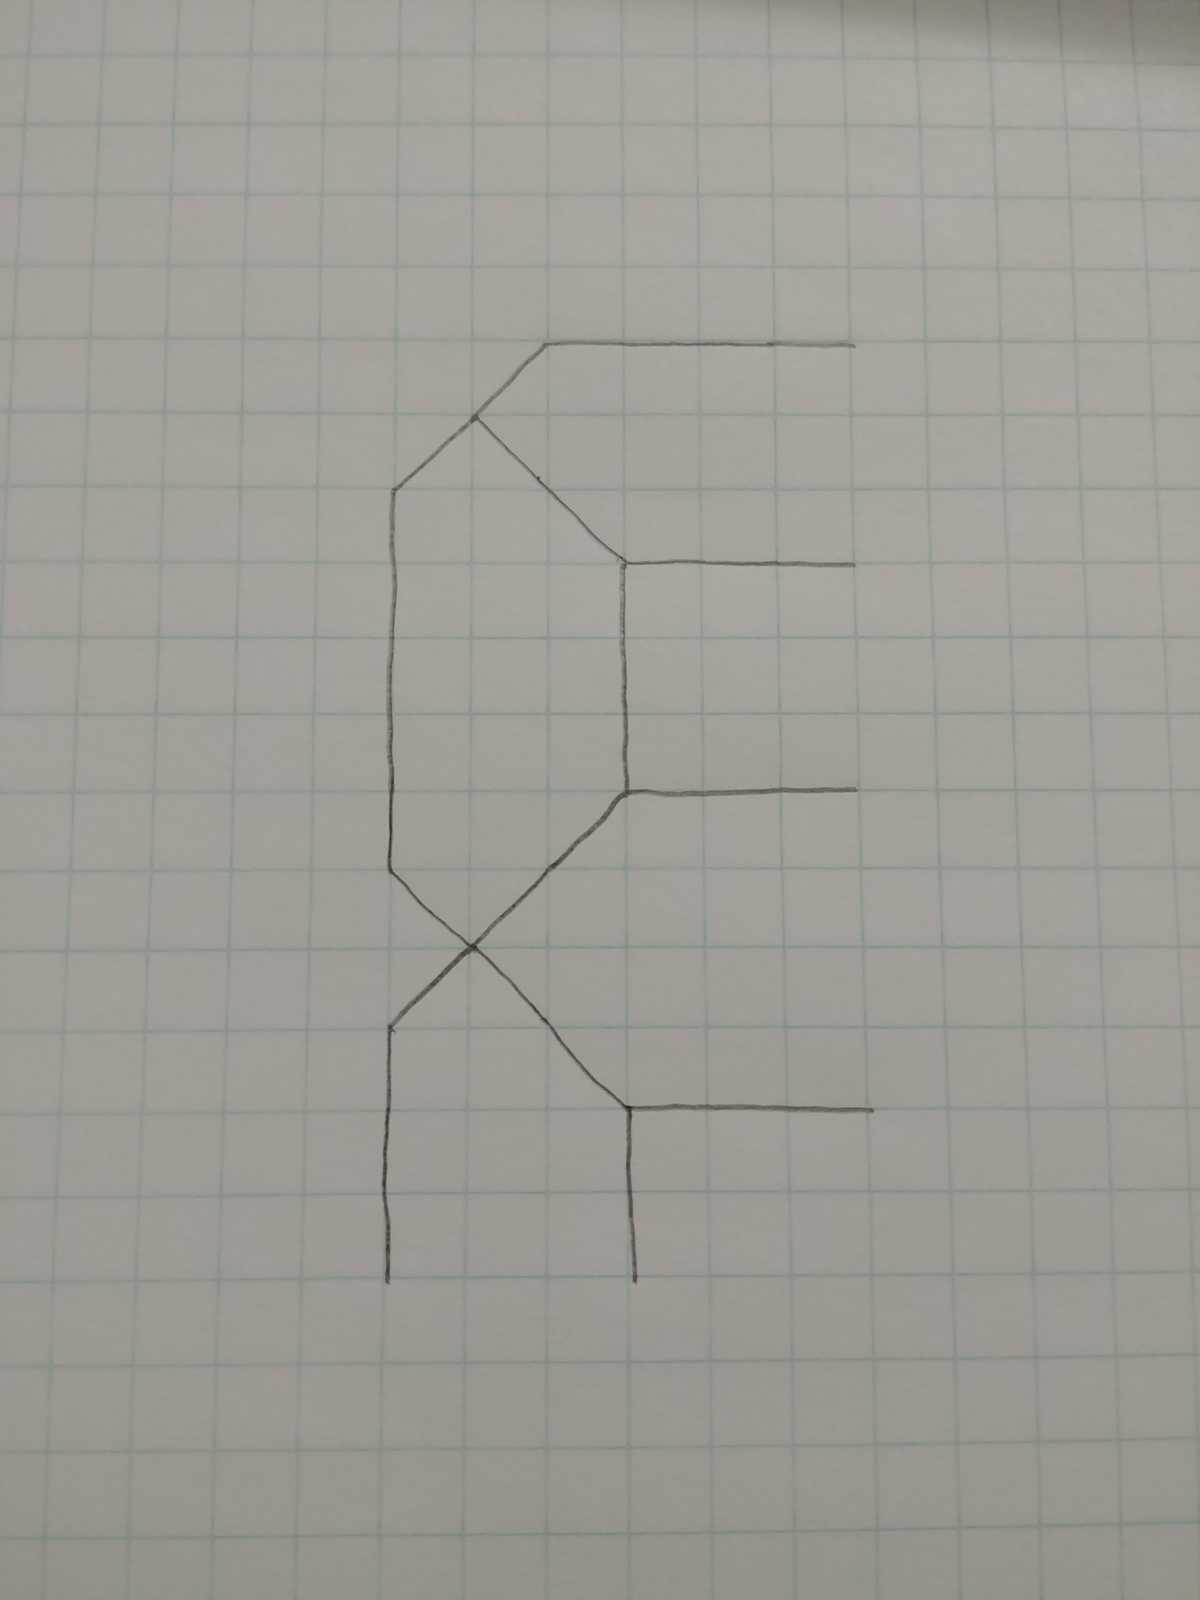
Being a lazy developer, I didn't want to reinvent the wheel when it came to how the pixels were shaped. Clocks have been doing this for decades, so I just wanted to create that same shape. After staring at a few pictures, I whipped out the trusty graph paper and came up reproduced the following shapes:
![]()
The top is the shape of the pixel on the borders of each digit. The bottom is the shape of the pixel in the middle of each digit.
I wanted to be able to scale the watch face, so I used the grid to come up with simple equations, in terms of height (h), for the position of each vertex.
Putting them all together
All the pixels now needed to line up next to each other. Leaving padding between the pixels out, they needed to match up like this:

I wanted to make sure everything looked good, so I made the app draw a digital 8 at full size, then adjusted the padding until I thought it looked right.
You can see all the magic at work in digital_number.dart - line 81.
These are all the values I ended up with for the digits:
    final double width = height / 2; // Digits are half as wide as they are tall
    final double thickness = width / 5; // Arbitrary thickness that looks good

    final double bigGap = thickness * 2 / 3; // Inside angle for outer pixels
    final double midGap = thickness / 2; // Angle for middle bar
    final double smallGap = thickness / 3; // Outside angle for outer pixels

    final double smallPad = thickness / 10; // Spacing for middle bar
final double bigPad = smallGap + smallPad; // Spacing for outer pixelsthickness, smallPad, and bigPad are the values I tweaked until I got something I liked. This was one of those times that flutter's hot reload was really nice.
The rest of the drawing code is just sticking those values together into a List so that we can paint polygons, like this:
void paint(Canvas canvas, Size size) {
[...]
/// Build a polygon for the left side of the digit
List<Offset> leftPolygon(top, bottom) {
return [
new Offset(left + smallGap, top),
new Offset(left, top + smallGap),
new Offset(left, bottom - smallGap),
new Offset(left + smallGap, bottom),
new Offset(left + thickness, bottom - bigGap),
new Offset(left + thickness, top + bigGap),
];
}
[...]
Path p = new Path();
[...]
p.addPolygon(leftPolygon(top + bigPad, middle - smallPad), true);
[...]
canvas.drawPath(p, paint);
}(I did a lot of staring at my graph paper to make sure I got these right.)
Which Pixels to use
There are a lot of ways to write code to turn on the given pixels for a number. I once designed a logic gate circuit to run a display like this, so I decided to take a similar approach here inspired by the Karnaugh Map.
![]()
For each number, we place an x on the pixels that it uses. Then we use that map to determine, for each pixel, what an optimal boolean expression is for when it should be on. They're at the bottom of the page. The paint method implements these digital_number.dart - line 128
Now, with the simple math out of the way, we can move on to the trigonometry involved with the analog clock face!
Analog Clock Face
To draw the clock hands we need two things, θ - the angle of the hand, and 𝓁 - the length of the hand. Once we have these two values, we can calculate our (x,y) coordinates for the outer-most point, then draw a line from the center of the clock face to that point.
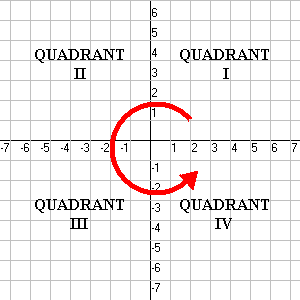
We have to do a bit of transformation to get the correct numbers, though. Our first challenge is that the Cartesian Plane quadrants go counter-clockwise, the opposite direction that we want them to go. Second, the coordinate system starts between Quadrants I and IV, and we need to start between I and II. Thirdly, the flutter coordinate system is in Quadrant IV.

Let's get started.
Calculating 𝓁
Our maximum length is the distance from the center of our component to the nearest edge, so:
    final Offset center = new Offset(size.width / 2, size.height / 2);
    final double maxLen = min(center.dx, center.dy);
Once we know that, each line's length is just a percentage of maxLen.
maxLen * .8 // Second hand
maxLen * .75 // Minute hand
maxLen * .5 // Hour hande
That was easy...
Calculating θ
This is a pretty straight-forward piece of code.
  // What percentage of the whole have we covered
  final percentage = timePart / timeTotal;
  // -2PI*percentage is how many radians we have moved clockwise
  // then we rotate backwards 180 degrees to correct for quandrant
  final radians = -2 * PI * percentage - PI;
There you have it: radians is our θ.
More verbosely:
timePartis how many seconds/minutes/hours have passed so far.timeTotalis how many total seconds/minutes/hours are in one full rotation.- We use those two values to find the
percentageof the whole (2π) they represent. - Then we rotate halfway around the circle to correct for the flutter quadrant.
Calculating (x,y)
We find our X,Y coordinates using Trigonometry's SOH CAH TOA, specifically the SOH and the CAH.

We know our θ from above as radians, and our hypotenuse is 𝓁. Our x coordinate is adjacent to, and our y coordinate is opposite of θ.
Which gives us x = 𝓁 * cos θ and y = 𝓁 * sin θ
We put them together in an offset for easy use.
new Offset(length * cos(radians), length * sin(radians));Wrapping things up
We turned all of that above into a convenient method that we can call over and over and over and over again.
/// Get the outside point around the rotation
/// [timePart] is how many seconds, minutes, or hours have passed
/// [timeTotal] is how many seconds, minutes, or hours are in one rotation
/// [length] is how far from center we want the point to end up (eg: hand length)
Offset _getPosition(double timePart, double timeTotal, double length) {
  // What percentage of the whole have we covered
  final percentage = timePart / timeTotal;
  // -2PI*percentage is how many radians we have moved clockwise
  // then we rotate backwards 90 degrees for correct position
  final radians = 2 * PI * percentage - PI / 2;

  return new Offset(length * cos(radians), length * sin(radians));
}
This method is what drives nearly the whole of the analog clock face. For instance, we use this method to draw the ticks for each of the minutes:
      final Offset outsideOffset = _getPosition(
          i.toDouble(), OctalDuration.MINUTES_PER_HOUR.toDouble(),
          maxLen - 1.5);
      final Offset insideOffset = _getPosition(
          i.toDouble(), OctalDuration.MINUTES_PER_HOUR.toDouble(),
          maxLen * insideFactor);

      canvas.drawLine(center + insideOffset, center + outsideOffset, paint);
As well as, obviously, the hands:
    // Second hand
    final Offset secondsOffset = _getPosition(
        oct2dec(second).toDouble(), OctalDuration.SECONDS_PER_MINUTE.toDouble(),
        maxLen * .8);
    canvas.drawLine(center, center + secondsOffset, paint);
One thing to notice, is the oct2dec call here. Our clock is just passing around our octal values as normal int values. Which means they are treated as base10 in math operations. We need to convert the octal number to its base10 equivalent before doing math on it, so that we get accurate results.
For the hour hand, we use the number of minutes in the hour that have passed as well, so that our hour hand slowly migrates as the hour passes:
    final int hourMinutes = oct2dec(hour) * OctalDuration.MINUTES_PER_HOUR +
        minutes;
    final int scismaMinutes = OctalDuration.HOURS_PER_SCISMA *
        OctalDuration.MINUTES_PER_HOUR;
    final Offset hourOffset = _getPosition(
        hourMinutes.toDouble(), scismaMinutes.toDouble(),
        maxLen * .5);
    canvas.drawLine(center, center + hourOffset, paint);
Conclusion
You now have over 1500 words describing how to do the math to generate clock faces. The analog clock face math can actually be useful during job interviews if you get asked the Clock Angle Problem.
You're welcome.
