Creating your first flutter app - Part 1
Flutter is a new mobile app SDK to help developers and designers build modern mobile apps for iOS and Android.
Flutter takes the approach of having a single code base for all platforms. Because flutter eschews OEM widgets1, all of our visual elements and most of our implementation is written in Dart and magically compiled to native code for each platform.
Flutter's One Code Base to Rule Them All design makes it easy for us to quickly write apps that look good, have high performance, and do not have feature/bug fragmentation.
Flutter also uses event-driven, reactive style programming (among others) which makes me partial to it, as I spend my day job working in React.
If you'd like to learn more about flutter before jumping in to the tutorial, head over to the docs.
Getting Started
First things first, we need to install flutter. Head over to the official documentation for instructions on how to set up your development environment: https://flutter.dev/docs/get-started/install
Once that is done, it's time to actually create our project.
We're going to build an Octal Clock for our app. For more information about how the Octal Clock works, you can read the README in the Pub: https://pub.dev/packages/octal_clock
Download
Visit the GitHub repository to clone the source. You'll want to do this because there are over 1100 lines of code in the final app (after all the parts), and we won't be going over every line of code, just the important ones.
This post uses the step1 branch:
git clone https://github.com/killermonk/octal_clock_app.git
git checkout step1
Create our project
This can be done using Android Studio 3.0+ but (as of this writing) there are some bugs with project creation, so we are going to use the command line flutter utilities. If you cloned the GitHub project, you can skip this step.
flutter create --org institute.flutter --description 'An Octal Clock implementation' octal_clock_appOur five arguments do the following:
--orgsets the application prefix. On Android: appicationId and package. On iOS: PRODUCTBUNDLEIDENTIFIER.--descriptionsets our package description in ourpubspec.yamloctal_clock_appthe name of the application to create. The project is place in a folder by this same name.
Run it
We can now run the sample application that was created by this command. Start up an emulator or plug in your phone and flutter run in your project's directory.
This can also be done in Android Studio by using the green play button.

Step 1
Update your local source checkout to the step1 branch. We will go through all our structure and major changes.
Install Dependencies
We are going to use the Octal Clock Dart Package to do all of our time conversions between imperial time and octal time. As such, we need to add octal_clock to our pubspec.yaml file.
dependencies:
  flutter:
    sdk: flutter
  octal_clock: "^0.0.5"  # NOTE: 1.0.0 is Dart2 compatible, but the app isn't updated yet to support it
Now that we've declared them, we install them. From the project directory, run:
flutter packages getAnd that's it, now we're ready to build our UI.
Creating our UI
All of our dart files are stored in the lib directory. Our main entry point is lib/main.dart. Currently, it has 4 things in it: the main function and 3 widgets. It's not good to have everything in this same file, so we're going to break things up a bit.
We going to create a new folder to store all our application's Page widgets: lib/src/pages. We need a page to display our clock, so create lib/src/pages/clock_page.dart.
clock_page.dart
This page will need to do two things:
- Display the current octal time
- Update at least once a second so the time gets updated.
We need to import the async package for our periodic updates, and our octal_cock package for our time handling.
import 'dart:async';
import 'package:octal_clock/octal_clock.dart';
Next, we need to create our Widget and its State.
class ClockPage extends StatefulWidget {
ClockPage({Key key}) : super(key: key);
_ClockPageState createState() => new _ClockPageState();
}
class _ClockPageState extends State<ClockPage> {
// ...snip...
Widget build(BuildContext context) {
// ...snip...
}
}Our widget doesn't do anything fancy because all the magic will happen in our state. We need state here to store our constantly mutating time information. Let's initialize our state variables and set up our timer.
class _ClockPageState extends State<ClockPage> {
Timer _timer; // tracks our periodic updates
OctalDateTime _time; // tracks our current octal time
void initState() {
super.initState();
// We start at the current time
_time = new OctalDateTime.now();
// We want to update 4 times per second
// so we can display millisecond values as well
const duration = const Duration(
milliseconds: OctalDuration.MILLISECONDS_PER_SECOND ~/ 4);
// Our periodic timer for when to update our time
_timer = new Timer.periodic(duration, _updateTime);
}
void dispose() {
// Make sure to cancel the timer when we dispose the view
_timer.cancel();
super.dispose();
}
void _updateTime(Timer _) {
// Update our state with the new time and force a redraw
setState(() {
_time = new OctalDateTime.now();
});
}Now that we're keeping track of the time and updating it periodically, we just need to flesh out our build method:
Widget build(BuildContext context) {
final ThemeData themeData = Theme.of(context);
// 0-padding for hours/minutes/seconds
String twoDigits(int d) {
if (d < 10) return '0$d';
return d.toString();
}
// 0-padding for milliseconds
String threeDigits(int d) {
if (d < 10) return '00$d';
if (d < 100) return '0$d';
return d.toString();
}
// Helper to make pretty time
String formatTime(date) {
return '${twoDigits(date.hour)}:${twoDigits(date.minute)}:${twoDigits(
date.second)}.${threeDigits(date.millisecond)}';
}
// Things we are going to display
final String date = '${_time.year}-${_time.month}-${_time.day}';
final String time = formatTime(_time);
return new Scaffold(
appBar: new AppBar(
leading: new Icon(Icons.watch_later),
title: new Text('Octal Clock'),
),
body: new Center(
child: new Column(
mainAxisAlignment: MainAxisAlignment.center,
children: <Widget>[
new Text(date, style: themeData.textTheme.headline),
new SizedBox(height: 10.0), // Padding
new Text(time, style: themeData.textTheme.display1),
],
),
),
);
}The concept for the twoDigits and threeDigits methods above were shamelessly stolen date_time.dart. Let's discuss our actual layout above.
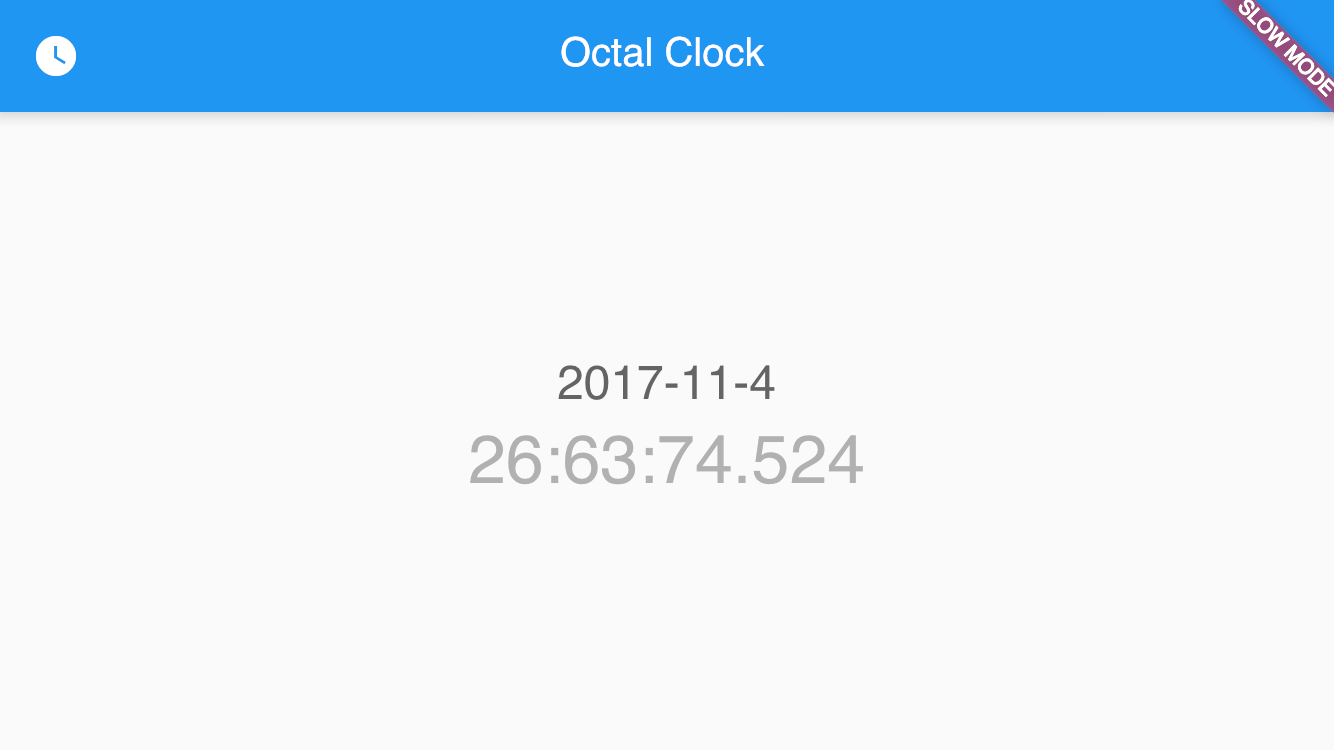
return new Scaffold
This is our main material widget for the page. The appBar looks like this (the "Slow Mode" text will disappear with a release build):

Our body is a centered Column. Our column stretches the entire available height, and we center things vertically with our mainAxisAlignment. We then put our formatted date and time into the app and we're done with the page!
Now we just need to tie this page into our main app.
main.dart
We don't want to use the example widgets, so go ahead and just delete MyHomePage and _MyHomePageState. We're also going to rename MyApp to OctalClockApp just for fun.
Now add the import for our clock_page at the top of the file:
import './src/pages/clock_page.dart';Then we flesh out the build method:
    return new MaterialApp(
      title: 'Octal Clock',
      theme: new ThemeData(
        primarySwatch: Colors.blue,
        fontFamily: 'Fixed',
      ),
      home: new ClockPage(),
    );
And that's it! We define the home property as our ClockPage and it gets built as a child of MaterialApp. We have our final app! A total of 105 lines of code and it works on both Android and iOS.

The true benefit of the Octal Clock isn't really apparent until we build an analog clock face for it. Head on over to Part 2 to check it out.