Tracking your Battery
Occasionally you need to know what the battery level is the device. This is pretty simple with the Flutter Community Plus Plugins version of battery plus from the flutter plugins.
Deprecation Notice
The blog article originally referenced the battery package, that has now been deprecated and replaced by the by the Flutter Community Plus Plugins version of battery plus.
As such, the tags in this repo are going to be very out of date, but the HEAD of the master branch has been updated to the latest and greatest.
Download
Visit the GitHub repository to clone the source for this application.
This original branches for this code were tested with Flutter 0.5.1
The latest updates have been tested with Flutter 3.3.2 and Dart 2.18.1
Setup
We're only going to cover the actual interaction with the battery plus and not the rest of the app. As such, we'll start at the starting_point tag in the repo. The app and the battery display are all built by this point and just waiting for the updates to happen.
Once the code is checked out, just run git checkout starting_point to update your local copy to the tag.
Our finished version is tagged as
with_battery
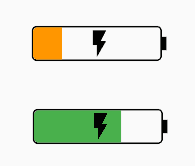
The app already has a basic battery icon that shows the charging state and charge level. It is initialized to a default state of charging with 75% charge level. We're going to make these values update dynamically.
We will use the variables _batteryState to store the current charging state, and _batteryLevel to store the current charge level.
The Code
Step 1: Import the package
The following steps were already done for this tag, but we're going to cover them quickly.
To add the plugin to our app, we need to add the following line to our pubspec.yaml under "dependencies:"
battery_plus: ^3.0.0If you're starting on the tag, this project is out of date and you won't be able to install the battery_plus plugin without much pain. This code is useful for a reference, but you should look at the code at the HEAD if you want things to work.
If you're using VSCode or Android Studio, they should either prompt your to update your dependencies or just do it automatically. If you're not, then run flutter packages get to download our new dependencies.
Next, we need to add the import to the top of our lib/main.dart file so that our code can use the new dependency.
import 'package:battery_plus/battery_plus.dart';Step 2: Add in the callback handling
In lib/main.dart, we need to update our state handling to account for the new library. All of the following code will be added inside the _BatteryLevelPageState class.
Step 2.1: Create a plugin instance
This is pretty straight forward, but we need to create an instance of the plugin in our code so that we can interact with it.
Fun Fact: The plugin uses a factory to implement the singleton pattern.
Add the following line of code to the top of the _BatteryLevelPageState class.
final _battery = Battery();We make this variable final because we never intend to reassign it to a new value. The name, _battery, is prefixed with an underscore to denote that the variable is "private".
Step 2.2: Set up our listeners
The battery provides two asynchronous properties that we are going to interact with. First batteryLevel which provides us with a 0 to 100 representation of the current charge level. Second onBatteryStateChanged that will inform us when the charging state of the battery changes or the battery level percentage has changed.
In the initState method of _BatteryLevelPageState, remove the current initializers for _batteryLevel and _batterystate and add the following code instead:
    _battery.batteryLevel.then((level) {
      this.setState(() {
        _batteryLevel = level;
      });
    });

    _battery.onBatteryStateChanged.listen((BatteryState state) {
      _battery.batteryLevel.then((level) {
        this.setState(() {
          _batteryLevel = level;
          _batteryState = state;
        });
      });
    });
Our first block of code is accessing the batteryLevel future. We're using .then to wait for the value to be available, then updating our state to store that value.
Our second block is roughly equivalent, except that onBatteryStateChanged is a stream that will supply us a new value periodically. We listen for any of these changes, re-query the current battery level, then update our state with both new values.
Step 3: Finishing up
All the heavy lifting was done already to make the _batteryState and _batteryLevel values be displayed. When we call setState, we are notifying the widget that it needs to repaint with new values. Then the magic all happens here:
              child: CustomPaint(
                painter: _BatteryLevelPainter(_batteryLevel ?? 0),
                child: _batteryState == BatteryState.charging ? Icon(Icons.flash_on) : Container(),
              ),
We have a CustomPainter to draw the battery and its charge level. Then, if we're charging, we tell the painter to draw a lightning icon inside itself. If our _batteryLevel has not yet been set, then we set the level to 0.
Step 4: Caveats
This is really only testable in an emulator with Android. The iOS emulators do not support changing or handling the battery state at the time of this writing.
Step 5: Credits
I borrowed heavily from the battery_indicator plugin for the custom painter for drawing the shape of the battery.
If you don't feel like drawing your own, the plugin above is easily customized to fit your needs.
Revision History
Added in Null Safety and added the appropriate sdk restrictions to pubspec.yaml.
The battery package has been replaced by the Flutter Community Plus Plugins version of battery plus. Updated the examples and repository to use the new plugin.

