Simple Games with Flutter: Hangman
To illustrate the separation of concerns concept made by our friends over at Dart Academy in Web Games with Dart: Hangman, we are going to re-implement their user interface (UI) in flutter while using a verbatim copy of their engine logic.
Because our game logic operates entirely separately from our UI code, it's actually pretty straight forward.
Download
Visit the GitHub repository to clone the source for this application.
This code was tested with Flutter 1.19.0-4.3.pre (beta channel), Dart 2.9.0. It has been updated to work with Flutter Web.
The original code (Flutter 0.4.2) can be found on the tag v0.0.1.
The Approach
We're going to set up a basic Flutter App, copy the engine code directly from Monty's Hangman Repo into our App, then write a new simple UI to make it work.
Setup
Create a new Flutter App.
In Android Studio, you can use File -> New Flutter Project, click Flutter Application, then Next. Name the application "hangman", then fill out the rest of the wizard (the defaults will suffice).
On the Command Line, simply flutter create hangman.
The Code
Step 1: Copy the "Engine" code
We're going to just stick the dart code for the engine straight into our app. Stick the file from Monty's Hangman Repo in lib/engine/hangman.dart so it's easily accessible by our code, then just completely ignore it because we'll make no modifications to it at all.
Step 2: Copy the images for each step of the game
The dart-html version of the game uses 9 images from imgur (see here). We're just going to bundle these images directly in our App, so we don't need network access.
I downloaded the images referenced in the code above and renamed them as followed:
data_repo/img/victory.png
data_repo/img/progress_0.png
data_repo/img/progress_1.png
data_repo/img/progress_2.png
data_repo/img/progress_3.png
data_repo/img/progress_4.png
data_repo/img/progress_5.png
data_repo/img/progress_6.png
data_repo/img/progress_7.png
We now need to update out pubspec.yaml to let our app know about these resources. In our flutter: section, we need to add the following:
flutter:
  assets:
   - data_repo/img/
Step 3: Build the UI
We're going to create our UI widgets here lib/ui/hangman_page.dart.
To further support the Separation of Concerns, this widget is going to accept the engine as an argument in its constructor. This allows us to use a form of dependency injection for unit testing, or changing the back-end, etc.
Step 3.1: Imports and Constants
import 'package:flutter/material.dart';

import 'package:hangman/engine/hangman.dart';

const List<String> progressImages = const [
  'data_repo/img/progress_0.png',
  'data_repo/img/progress_1.png',
  'data_repo/img/progress_2.png',
  'data_repo/img/progress_3.png',
  'data_repo/img/progress_4.png',
  'data_repo/img/progress_5.png',
  'data_repo/img/progress_6.png',
  'data_repo/img/progress_7.png',
];

const String victoryImage = 'data_repo/img/victory.png';

const List<String> alphabet = const [
  'A', 'B', 'C', 'D', 'E', 'F', 'G', 'H', 'I', 'J', 'K', 'L', 'M',
  'N', 'O', 'P', 'Q', 'R', 'S', 'T', 'U', 'V', 'W', 'X', 'Y', 'Z',
];

const TextStyle activeWordStyle = TextStyle(
  fontSize: 30.0,
  letterSpacing: 5.0,
);
We're going to use the material library for our widgets, and the hangman import is our engine file. We use this so we can use the HangmanGame interface as a type.
We explicitly define our image paths (the same way as the original Dart code).
We then define all the letters of the alphabet so we can quickly reference them for our guesses. The original dart code generated these programmatically, but we just hard coded them for simplicity.
Lastly, we define the Text Style that we use to style the "Active Word" (the word that is currently being guessed).
Step 3.2: Create the Widget and State
We're going to create the basic skeleton for the UI before we build it out.
class HangmanPage extends StatefulWidget {
final HangmanGame _engine;
HangmanPage(this._engine);
State<StatefulWidget> createState() => _HangmanPageState();
}
class _HangmanPageState extends State<HangmanPage> {
}Because things will be changing our public widget HangmanPage is Stateful. As discussed earlier, we're injecting the engine into the Widget as the constructor argument _engine. The underscore prefix tells Dart that this is a private member. However, since Dart's privacy boundary is the library, we'll still be able to access this from our State easily using widget._engine (more on this later). This widget is mostly just an initializer for our State: where all the magic happens.
Our Widget's State (_HangmanPageState) is where all of our display logic and handling will take place. The underscore prefix tells Dart that this is a private class, only accessible inside this library. Let's start implementing it.
Step 3.3: Add State Variables
The game needs to track several things for the UI as the game progresses. Add these variables inside the _HangmanPageState's curly braces. Notice that they are all prefixed with underscores, telling Dart that they are private members.
  bool _showNewGame;
  String _activeImage;
  String _activeWord;
Our first variable, _showNewGame, will be used to determine whether or not our UI should show the "New Game" button.
Next we will be using _activeImage to store the relative path to the image we want displayed for the current state of the game. These are the images that we have stored in our data_repo folder.
Lastly, but maybe most importantly, we have the _activeWord. This variable is what will store the current word that the user is trying to guess.
Step 3.4: Initialize our default State
Add these next lines just below the variables that we just added.
void initState() {
super.initState();
widget._engine.onChange.listen(this._updateWordDisplay);
widget._engine.onWrong.listen(this._updateGallowsImage);
widget._engine.onWin.listen(this._win);
widget._engine.onLose.listen(this._gameOver);
this._newGame();
}
void _newGame() {
widget._engine.newGame();
this.setState(() {
_activeWord = '';
_activeImage = progressImages[0];
_showNewGame = false;
});
}Firstly, we set up our callbacks for all the engine events. We use widget._engine, like we talked about above, to do this. Whenever the engine broadcasts one of these events, we will listen to and respond to it from our UI.
We set up the listeners in initState so that it only happens once when the widget is first created. Do not setup up listeners, etc, inside the render method.
Lastly, we call _newGame. This signals the engine to initialize, then sets our state variables to their default values. _activeWord is empty until a broadcast from _engine.onChange is received, _activeImage starts out at our first image (just the scaffold), and _showNewGame is set to false (meaning we'll show the letter pickers instead of the new game button).
Step 3.5: Set up our listener callbacks
We're now going to write the callbacks for the listeners that we set up in initState.
Add all these methods just below _newGame in the code.
  void _updateWordDisplay(String word) {
    this.setState(() {
      _activeWord = word;
    });
  }
When we get a broadcast from _engine.onChange this method is called with the new word. We simply take that word and update it in the state, so our UI knows what the word is and that it should re-render. Modifying these variables outside of a setState callback will not cause the widget to re-render. Always make sure to mutate the state inside a setState callback.
  void _updateGallowsImage(int wrongGuessCount) {
    this.setState(() {
      _activeImage = progressImages[wrongGuessCount];
    });
  }
This is the callback for _engine.onWrong, and it gives us the number of incorrect guesses for this word. We simply use this number as the index for the next image we will display.
void _win([_]) {
this.setState(() {
_activeImage = victoryImage;
this._gameOver();
});
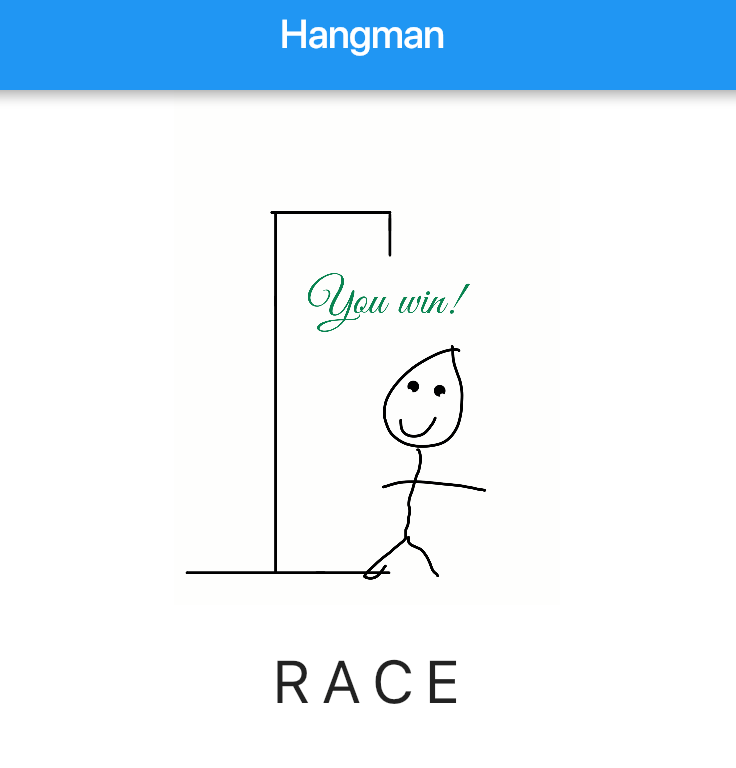
}When _engine.onWin broadcasts, we end up here. We set the image to our victory "You Win!" image, then call our end-of-game handler.
  void _gameOver([_]) {
    this.setState(() {
      _showNewGame = true;
    });
  }
This is either triggered by _engine.onLose or by the onWin cleanup. All it does is set _showNewGame to true so that we know we want to hide the letter pickers and display the "New Game" button. Communicating to the user whether the game was won or lost is handled by the _activeImage.
Step 3.6: Build the main UI
Let's implement the build method for this widget. Add the following code just below the _gameOver method.
Widget build(BuildContext context) {
return Scaffold(
backgroundColor: Colors.white,
appBar: AppBar(
title: Text('Hangman'),
),
body: Center(
child: Column(
mainAxisAlignment: MainAxisAlignment.center,
children: <Widget>[
// Image
Expanded(
child: Image.asset(_activeImage),
),
// Word
Padding(
padding: EdgeInsets.all(20.0),
child: Center(
child: Text(_activeWord, style: activeWordStyle),
),
),
// Controls
Expanded(
child: Center(
child: this._renderBottomContent(),
),
),
],
),
),
);
}First, we're creating the Scaffold for the whole app with a simple title of "Hangman" in the App Bar.
As our children, we center a Column. Our column has three stacked children: the Image (the current state of our hanged man), the Word (that is being guessed), and the Controls (the letter pickers, or the New Game button).
The Image and Controls are both Expanded so they will expand to fill all available space equally. They will fill the space equally because they both have the default flex factor of 1. Because the Word is not also Expanded, it will be squashed to its minimum extents.
Step 3.7: Build the controls
You may have noticed that our Controls in the build method are calling this._renderBottomContent(). This method does our simple logic to determine if we're showing the New Game button or the letter pickers.
Add the following code into our Widget.
  Widget _renderBottomContent() {
    if (_showNewGame) {
      return RaisedButton(
        child: Text('New Game'),
        onPressed: this._newGame,
      );
    } else {
      final Set<String> lettersGuessed = widget._engine.lettersGuessed;

      return Wrap(
        spacing: 1.0,
        runSpacing: 1.0,
        alignment: WrapAlignment.center,
        children: alphabet.map((letter) => MaterialButton(
          child: Text(letter),
          padding: EdgeInsets.all(2.0),
          onPressed: lettersGuessed.contains(letter) ? null : () {
            widget._engine.guessLetter(letter);
          },
        )).toList(),
      );
    }
  }
If _showNewGame from our internal state is true, then we're going to return a simple button with the text "New Game" on it. When it is clicked, it will call this._newGame that we implemented earlier.
Otherwise, we are going to create our letter pickers. We have two states for any given letter: guessed and not guessed.
To simplify things, we first create a local variable lettersGuessed to point to the Set of the same name from the engine. This saves us lots of typing.
Next we return a Wrap that will contain all our letter buttons. The Wrap will lay things out linearly and wrap them to a new line when they hit the edge of the screen. We set the spacing to add horizontal space between each button and set the runSpacing to add vertical spacing between each line, then we set the alignment to center, so the last line will be centered on the screen.
The real magic happens when we declare the children. We map over each letter and return a new MaterialButton for each letter with the letter as the button text, some padding, and handling the clicking. If the letter has already been guessed, we set onPressed to null so that the button will appear disabled. Otherwise, we set it to a closure that calls guessLetter on the _engine, so that the engine can appropriately handle the user's guess.
Lastly, we make sure to convert the Iterable returned by map into a List by calling .toList().
Step 4: Tie it all together
We've now created the UI for the game and copied the engine, but we need to tell our app to actually render that UI, and give the UI its proper engine dependency. We're going to do this with our "App" widget.
We're going to blow up the default lib/main.dart file that contains the stock app widget and rebuild it from scratch, so go ahead and open the file and just delete everything in it.
Step 4.1: Imports and Constants
Add the following code to lib/main.dart
import 'package:flutter/material.dart';

import 'package:hangman/engine/hangman.dart';
import 'package:hangman/ui/hangman_page.dart';

const List<String> wordList = const ["PLENTY","ACHIEVE","CLASS","STARE","AFFECT","THICK","CARRIER","BILL","SAY","ARGUE","OFTEN","GROW","VOTING","SHUT","PUSH","FANTASY","PLAN","LAST","ATTACK","COIN","ONE","STEM","SCAN","ENHANCE","PILL","OPPOSED","FLAG","RACE","SPEED","BIAS","HERSELF","DOUGH","RELEASE","SUBJECT","BRICK","SURVIVE","LEADING","STAKE","NERVE","INTENSE","SUSPECT","WHEN","LIE","PLUNGE","HOLD","TONGUE","ROLLING","STAY","RESPECT","SAFELY"];
The imports are the flutter material widgets that we know and love, then the engine that we copied in step 1 and the UI we created in step 3. We also define a list of words (again, just stole this straight from the original tutorial) that we want to randomly select from for our user to guess.
Step 4.2: Create App Widget
Just below the wordList we are going to create our App widget and its State.
class HangmanApp extends StatefulWidget {
State<StatefulWidget> createState() => _HangmanAppState();
}
class _HangmanAppState extends State<HangmanApp> {
HangmanGame _engine;
void initState() {
super.initState();
_engine = HangmanGame(wordList);
}
Widget build(BuildContext context) {
return MaterialApp(
title: 'Hangman',
theme: ThemeData(
primarySwatch: Colors.blue,
),
home: HangmanPage(_engine),
);
}
}The actual HangmanApp is just a simple widget to create the State. This State does all the magic.
In initState, we initialize our engine with our predefined wordList. This initialization will only happen once. (Because it is a mutable state property, it also would allow us to use a setState to create a new engine. Something like adding in a multi-player version.)
Lastly, we build our App. We create our main MaterialApp widget using the Material blue theme. Then we set our home navigation page (the default widget to render for the app) to an instance of our HangmanPage widget initialized with the _engine.
Step 4.3: Run the app
Now that we've configured everything, we just need to make it all run. Add the following code to the bottom of the lib/main.dart file, outside of the Widgets we just created.
void main() => runApp(HangmanApp());The main function is our application's entry point, and we tell flutter to run the app we just created.
Now, we can use flutter run and actually play our game.
Summary
As we can see, we were able to just re-use the code from the dart-web game engine verbatim, and just add a new UI on top of it to get it working in Flutter. The new UI was able to interact with all the same events, etc.
For more on code sharing between web and flutter, I found this talk at Dart Conf to be extremely useful: Flutter & Web - Unite your code and your teams (DartConf 2018).